
This is one of those stitches that you either love or hate. I am determined to teach you to love it. I haven’t ever understood why some people find it so hard but I think it’s because I settled into a really nice method early on. So I’m going to teach you my nice method.
A couple of notes before I start:
- French knots go on after you have done all your cross stitching and back stitching. They with the beads are the last stitches that go on your piece because they stick out the most and need to be on top of everything else.
- They are not your enemy so stop thinking of them as being bad and just put them on, The effect is always amazing.
- You don’t need any special needles for these or special threads I just use as many strands as the pattern says (usually 2 but… it can change) and go for it.
1. Bring your thread out at the spot you will be making your French Knot. Hold it to the left and bring the needle up ready to wrap the thread.
 2. Wrap the thread twice around the needle like the picture below shows you.
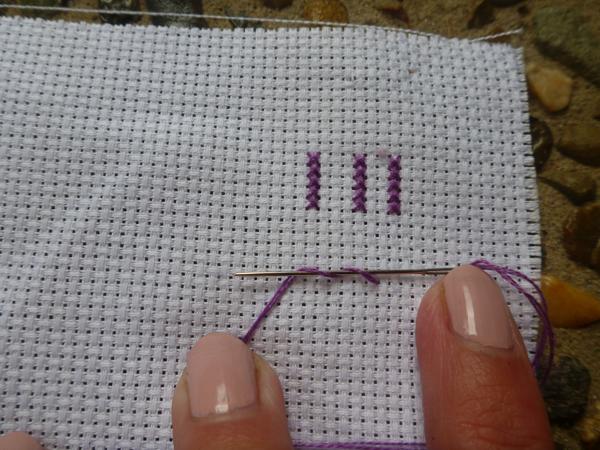
3. Poke the needle back through the fabric while keeping the twist held on the needle. You want to go down a different spot in the fabric than where you came out otherwise the knot can very easily be pulled to the back.
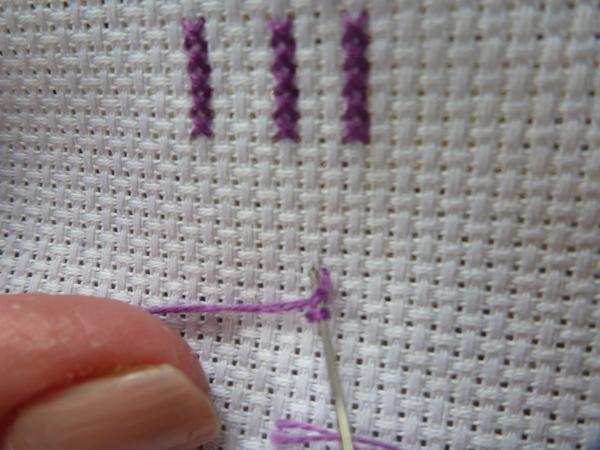
4. Before you pull the needle through pull the thread tighter around the needle so that there isn’t a gap between where the knot is forming and the fabric. Like so:
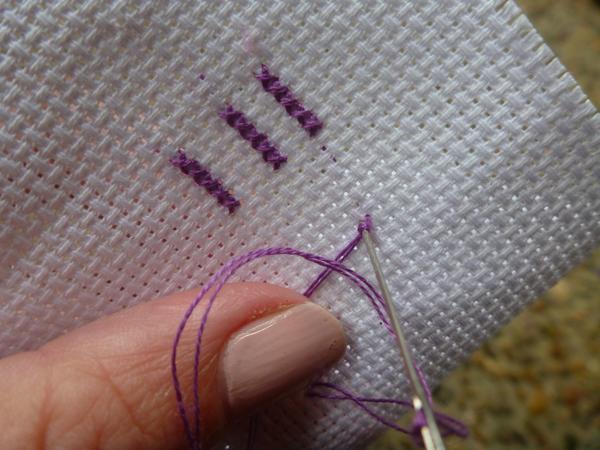
This makes sure the knot forms where you want it to.
5. Keeping tension on the thread though not too tight pull the needle through and continue to pull tight until you have a knot.
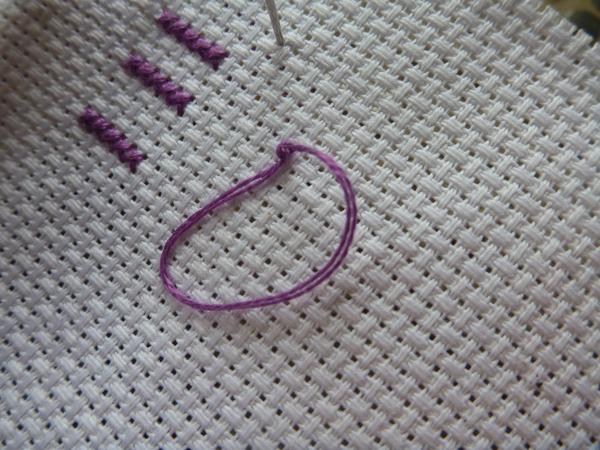 and there you go. You have a French knot!
It’s really as simple as that. No need to be scared of them. They look awesome and add a great effect to a finished piece.
Happy Stitching,
Caitlin

My mother taught me to crochet when I was 9 and I was hooked. Since then I do any craft that tickles my fancy which at the moment includes cross stitch, knitting, crochet, quilting and sewing toys and clothes. I like to always have something to do.





 Crochet Along: Let's Start!
 Crochet Along: How to Change Colours
 DIY: Sewing Machine Extension Table



[…] {Caitlin taught us to sew a french knot} […]