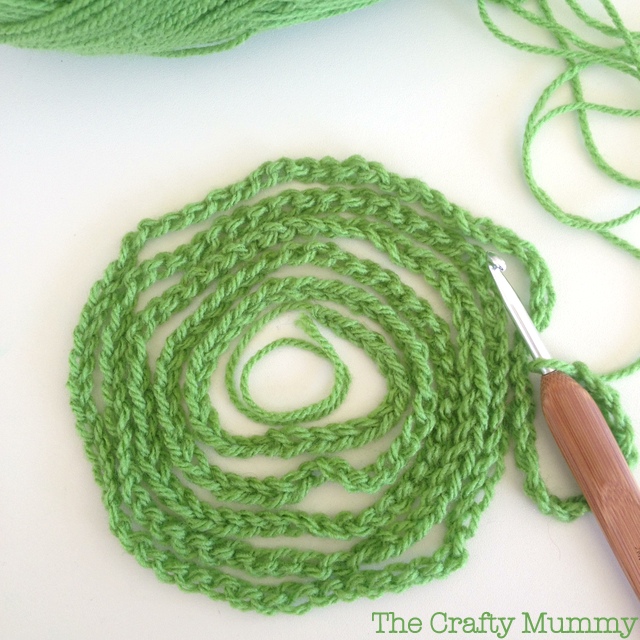
It’s time to get started on our Crochet Along. Did you choose your yarn and your hook? Great! Feel free to ask questions if you still have any. I answered some earlier in the week - here in case you missed them - but it is not too late to ask more.
Simple Crochet Blanket
Here’s the pattern for those who can crochet:
- Chain stitch until your chain is as wide as you want your blanket to be. (My chain is 74″ or 188cm. I did 228 chains plus 2 extra for turning.)
- Chain 2 extra
- Turn. Skip 2 chain. Double Crochet into each stitch all the way back along your chain.
- Chain 2 and turn.
- Skip the 2 chain and double crochet into the top of each double crochet back along the row.
- Continue to double crochet along each row with 2 chain for turning at the end of each row.
- Change colours whenever you feel like it. (I’ll talk more about changing colours next week if you need help with this.)
More details for everyone who needs it:
We’re going to make a super easy crochet blanket. We start off with a loop then create a string of chain stitches. Look at the image below to see how to form a starting loop:
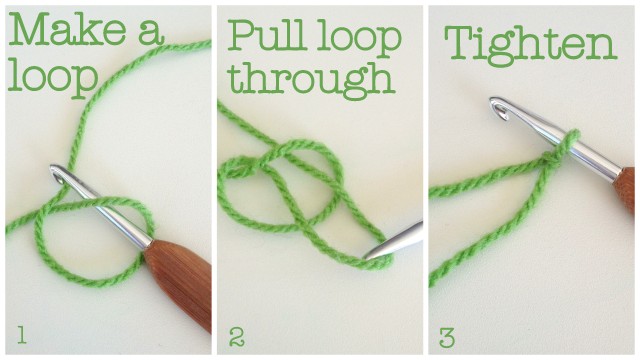
1. Make a loop with your yarn about 4″ or 12cm in from the end.
2. Slip your crochet hook through the loop and use the hook to draw a loop of yarn through the first loop.
3. Gently pull the loop tight around the hook.
Crochet a Chain
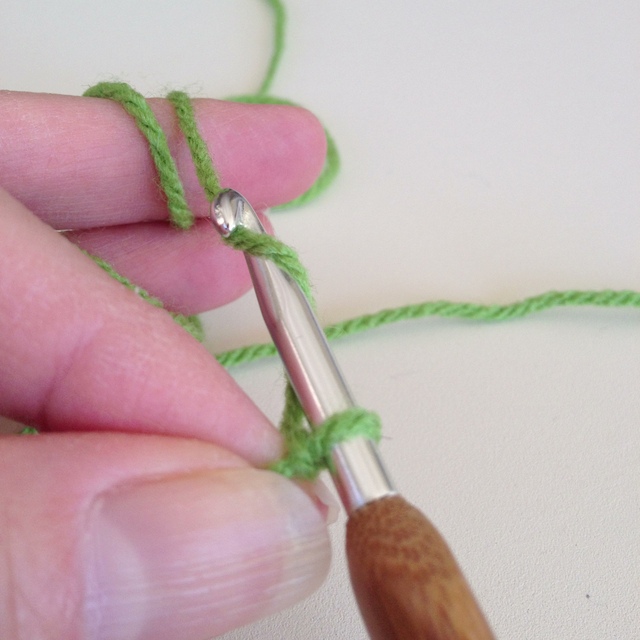
Hold the tail from your loop with your thumb and first finger, and draw the other piece of yarn out between your fingers.
Loop the hook under then around the yarn. We call this a “yarn over” in crochet. It really just means catching the yarn with your hook so you can pull it through the loop already on your hook.
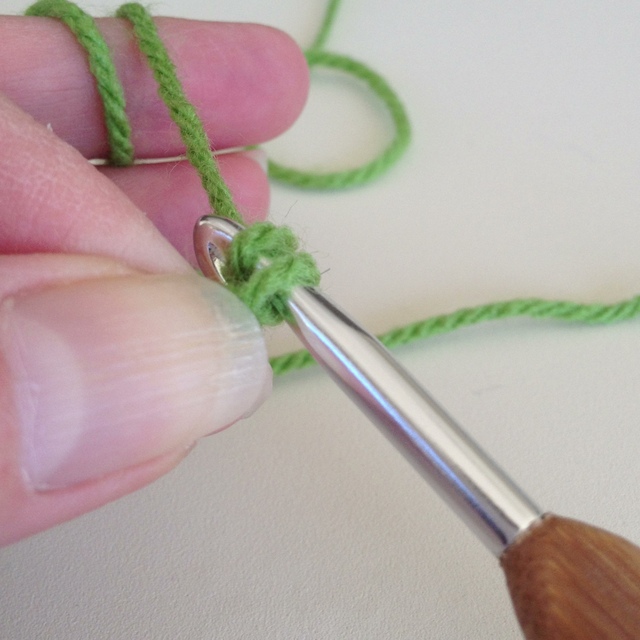
Gently pull the yarn down towards your loop.
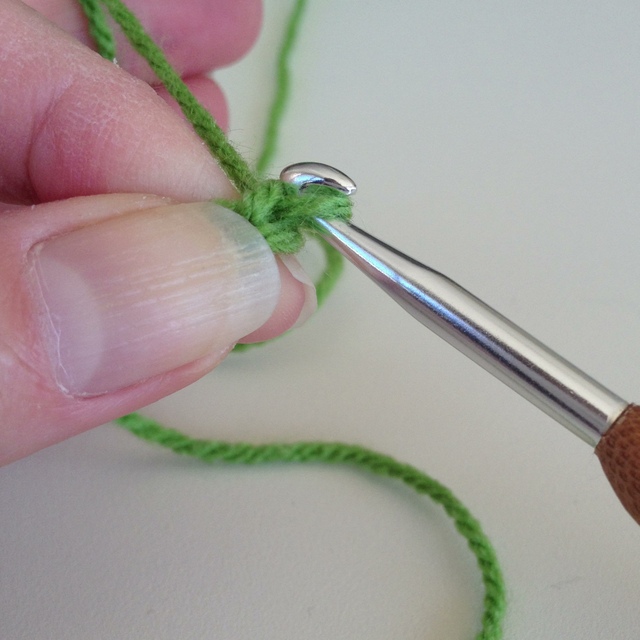
You may need to let the loop loosen a little as you get closer so you can get the hook through. Pull the hook through with the loop of yarn. One chain done!
It takes a little bit of practice so don’t panic if it looks odd at first. You’re going to make a whole long chain of these so you’ll have plenty of practice! It can be hard at first to get them not too tight and not too loose, but in this case looser is better. It will be easier to do the second row if your chain is a little looser. After a little you will get into a rhythm and get used to controlling the yarn. Everyone has their own “tension” in their crochet stitches depending how tight or loose they are. You will gradually find yours as you go along.
Keep making your chain until it is the width that you want your blanket to be. Then do 2 extra chains for turning. My chain is 74″ or 188cm. I did 228 chains plus 2 extra for turning. The extra turning stitches allow the blanket edges to lay flat.
How to Double Crochet
The rest of the blanket is going to be a stitch called Double Crochet.

Hold the chain in your left hand and we’re going to double crochet along the chain to create the next row. Remember to skip the extra 2 chains and double crochet into the third chain from the hook.
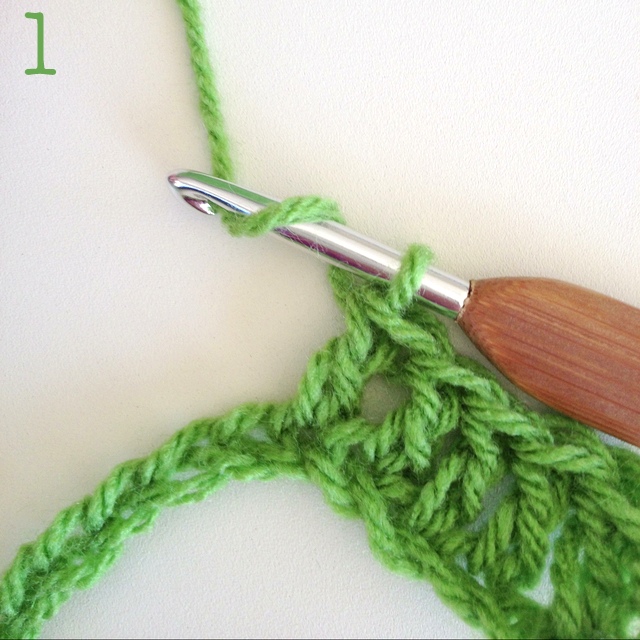
1. Start by putting the hook under then over the yarn to create a “yarn over”, just like we did earlier when we made chains.
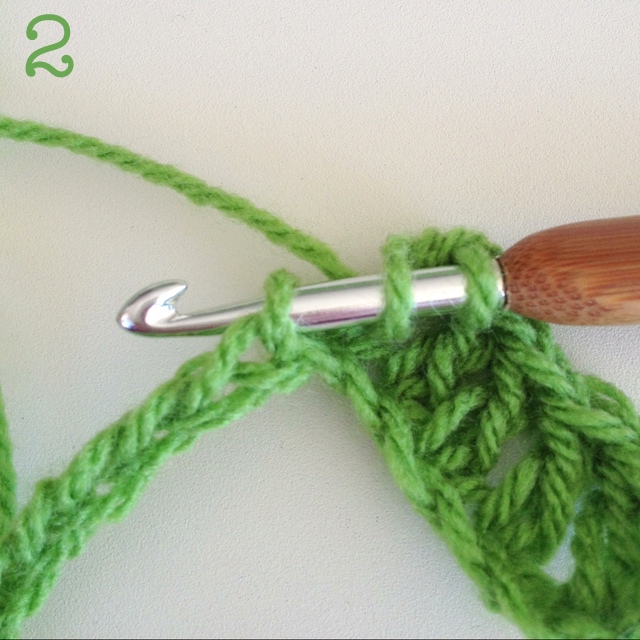
2. Then put the hook through or into the 3rd chain from the hook. You will have 3 loops on the hook.
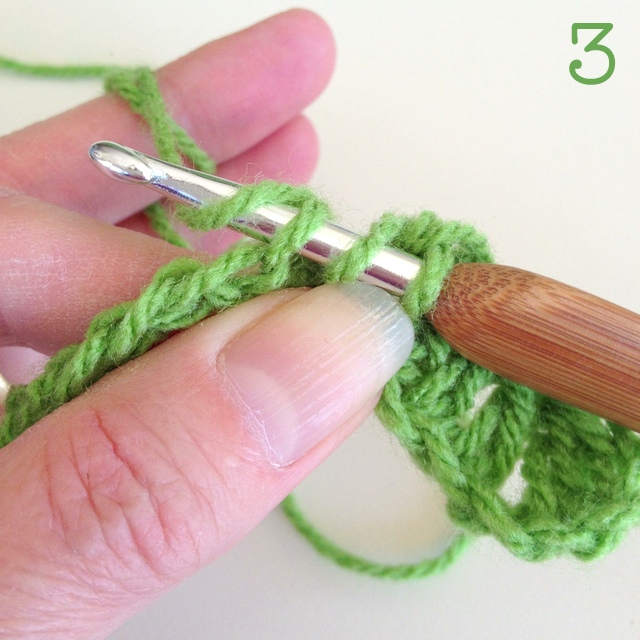
3. Yarn over again so it will look like 4 loops on the hook.
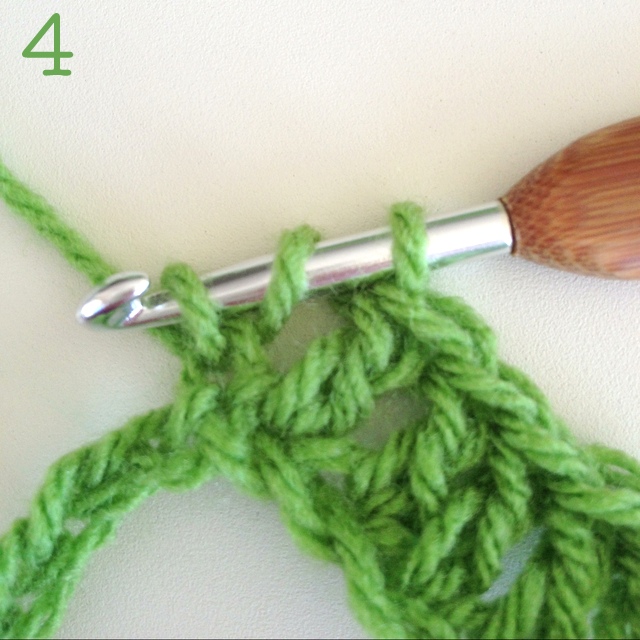
4. Pull that loop through the chain leaving 3 loops on the hook.
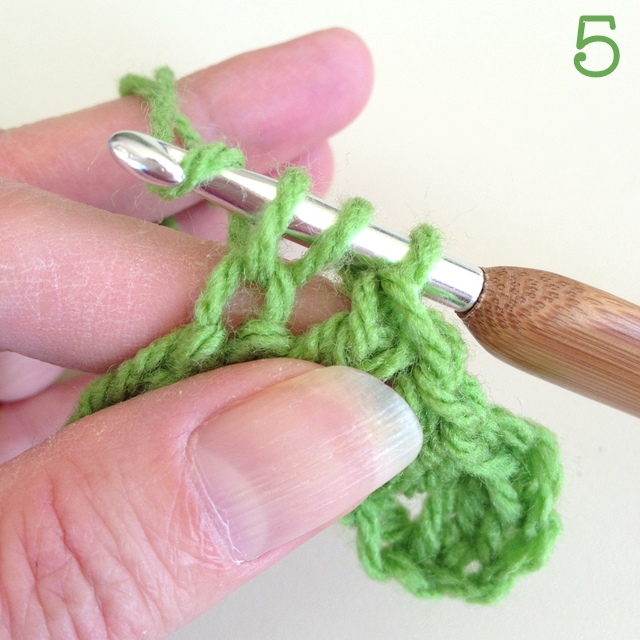
5. Yarn over again.
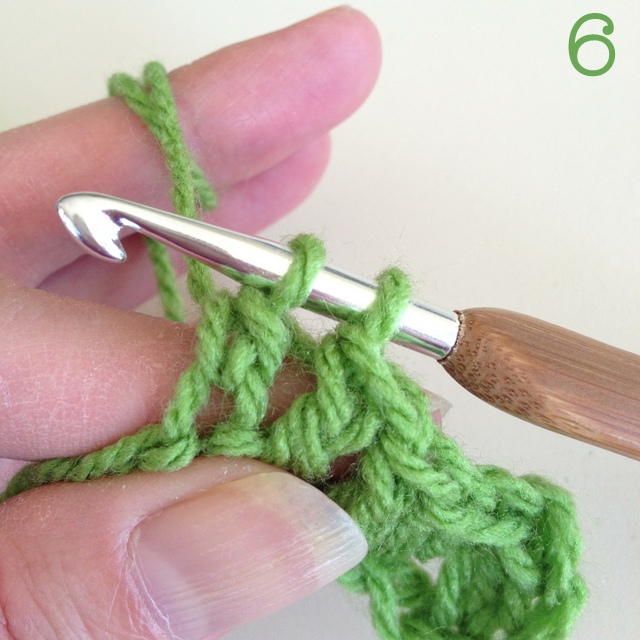
6. Pull the loop through the first two loops, leaving 2 loops on the hook.
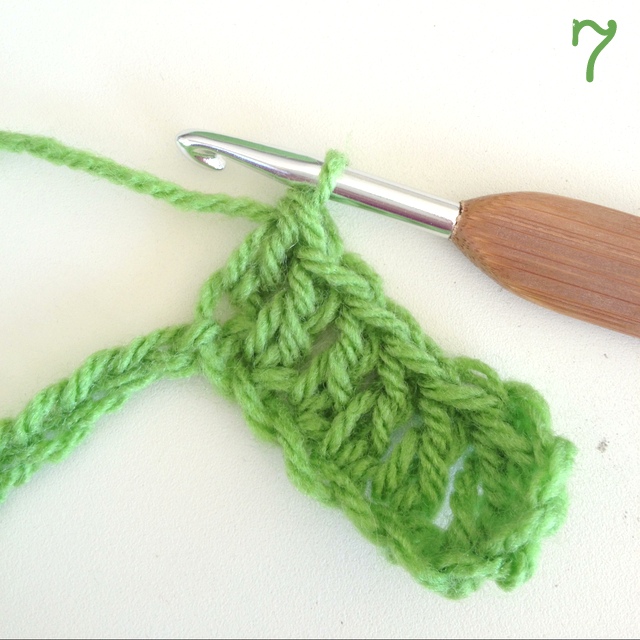
7. Yarn over again and pull it through the last two loops. This will leave one loop on the hook and you’ve created one double crochet stitch. Well done!
Work your way along the row and double crochet into each chain. If the chain is tight, this can be tricky so take it slowly. I often find that the first row is the hardest and the next row easier.
When you get to the end, chain two stitches and turn your work so you are holding it in your left hand ready to double crochet along the next row. Double crochet into the top of each double crochet of the previous row.
Your blanket will continue to grow as you work your way along each row. Next week I’ll explain how to join a new ball of yarn when you finish a ball and how to change colours.
Something to think about:
Where do you want to change colours? Do you want two rows of each colour? Or 3 rows? Or 4 rows? Do you want to have regular bands of colour, all the same width, or random colour changes that create bands of colour in different widths? Do you want to change colours at the end of a row or in the middle of rows? Or whenever your yarn runs out?




Tonya is the voice behind TheCraftyMummy.com. She dabbles in lots of different crafts – patchwork, quilting, cross-stitch, scrapbooking, knitting, crochet and sewing. She also writes about blogging and social media.




 Crochet Along: How to Change Colours
 DIY: Sewing Machine Extension Table

By double crochet are you using American terms or UK terms
I believe it is a US Double Crochet - or a UK Triple Crochet.
Here’s the short summery:
Yarn over, insert hook, yarn over and draw through, yarn over and draw through 2 loops, yarn over and draw through last 2 loops.
CraftyMummy recently posted..UFO Challenge August
By the description you give that is a treble in UK terms.
Do you have any idea how many weeks we will work on this project? I’m just wondering how quickly we should attempt to progress…
Thanks!
I haven’t set any time span, Erin, but I figure I’ll keep writing posts about it until my blanket is finished. I’d say at least 6 weeks, depending on how busy I get.
I haven’t crocheted in 20 years and your tutorial inspired me. I’ve been crocheting all day today 🙂 Thank you!
Thank you! You’ve made my day! So pleased to have inspired you
CraftyMummy recently posted..iPhone App: Easy Stitch
I’ve started mine today and I love it. I’ve only just started to crochet in the last few months but I’m addicted! Thanks
Can’t wait to see your progress, Sandy
CraftyMummy recently posted..iPhone App: Easy Stitch
After much deliberation and loads of procrastination, I have decided to do solid squares for my blanket… 1 of the colours I am using is very like the tutorial… have added a bright orange and plain white to the mix.. will just keep crocheting until I have the size I want/need…
Great tutorial for beginners I might add!!
Lynne recently posted..Bearded Beanies – Finished
Thanks Lynne. I wanted to make it easy for anyone to join us for this project. Can’t wait to see your progress though - your colours sound fabulous!
CraftyMummy recently posted..iPhone App: Easy Stitch
I added to #CrochetAlong on Instagram as Houleyhoop…hoping this will keep me inspired/motivated 🙂 I finished a little warm up project and started the blanket. It’s 90 degrees here in California and I’m handling wool…so you know you got me hooked!
Yay!I just found you over on Instagram. I’m “CraftyMummy” - of course! Love the yarn you’re using!
CraftyMummy recently posted..iPhone App: Easy Stitch
This looks like a great project - I just learnt to crochet last week, and want to make a blanket, so when I find some yarn, I’ll be joining in!
I scoured the op shops today Tonya and it wasn’t my lucky day. A few odd balls of yarn in varying colours but nothing in the colours I wanted. I finally succombed to some discounted yarn at my local $2 shop so I’m making a start tonight. I’m going to use this opportunity to teach my daughter. I learnt to crochet when I was about 7 or 8 years of age. Looking forward to joining in something for a change.
Anne xx
Anne @ Domesblissity recently posted..Darth Vader @ Book Week
Hi there! First time reader/commenter. I’ve been knitting since high school, but only recently learned crochet. I was wondering how many balls of yarn you ended up using for the Simple Boy blanket?
Kim recently posted..“The Dirty Game” or is it?
Love the blanket, so inspired to start one. Would you address the best way to deal with the yarn ends? When I “weave” in the ends from color changes, they end up coming out. Since these have lots of color changes—you must have a good method!
Never mind! I found the tutorial, I’m cutting my ends too short. I’ll give your method a try!!!!
This is a very well done, easy to follow tutorial for beginners. I’ve never crocheted before today, and I was able to follow along and learn the basic chain and double stiches. Thank you for putting together such great instructions. This was much better than the ‘teach yourself crochet’ book I bought.
Thanks Nicole. I’m so glad it was helpful and easy to follow.
Tonya Grant recently posted..ModernQAL: Parisian Star Block
I love this! Nice and simple for this rookie! Just a quick question, and not sure if I missed this, what size hook did you use? THANKS!
Hi Ana
I’m using a size 4.5 hook for mine.
After you stitch 2 and turn what # chain do you start in? Thank you.
When you get to the end of a row, chain two and turn, you would then crochet into the top of the first proper stitch from the previous row, not the two chain. The two chain are to give height so you don’t get a funny bumpy edge on your blanket. I hope that helps.