Well didn’t this quilt give me grief?! I had planned to get it up on the blog on Sunday night but between kids getting sick and then me getting sick it just seemed increasingly unlikely it would happen.
Then I started to make good progress, that was after I actually miscalculated my square sizes and royally stuffed everything up.
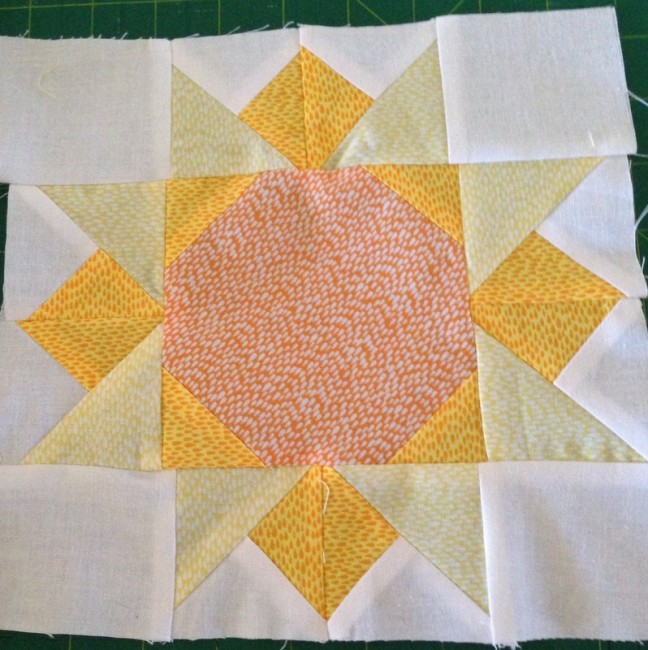
My ‘sun’ block using the wrong sized triangles. I ended up trimming down the centre square so I could finish the block to work out if I made any additional mistakes in my planning.
But I got back on track and got stuck into it and everything and was plodding along nicely. I was feeling great about getting it finished in time and then well, the three year old came along with a BIG bottle of tomato sauce.
Yep, I ended up with a big slosh of tomato sauce on my mainly WHITE quilt top.
Several times counting to ten and a lot of cold water did the trick and then I was back on track.
I have a very loose tutorial for this mini quilt. When I say loose I mean I cut larger squares than necessary so that I could trim them down to the correct size so that I wouldn’t have my quilt math problem happen AGAIN.
What you need:
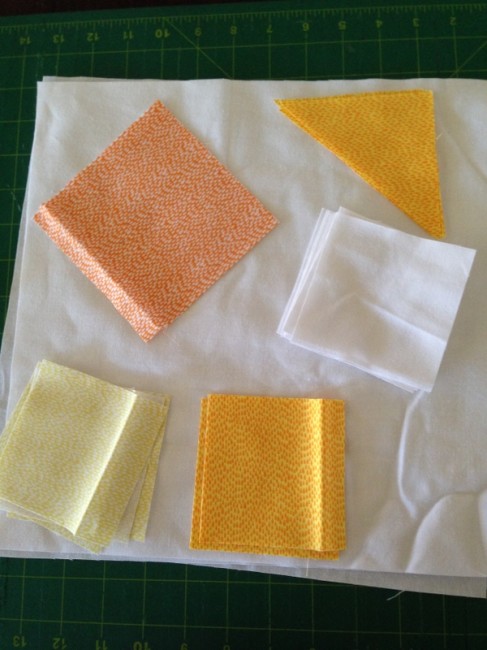
Orange Fabric- 1 x 4 3/4 inch square
Dark Yellow Fabric- 2 x 4 inch squares cut in half on the diagonal to form 4 triangles.
2 x 5 3/8 ” squares
Light Yellow Fabric- 4 x 4 3/8″ squares
White Fabric- 3x 13 inch squares
2x 5 3/8″ squares
4 - 4×3.5 inch rectangles for corner pieces of star block.
I’ll cover what you need for the embroidered section in Part 2.
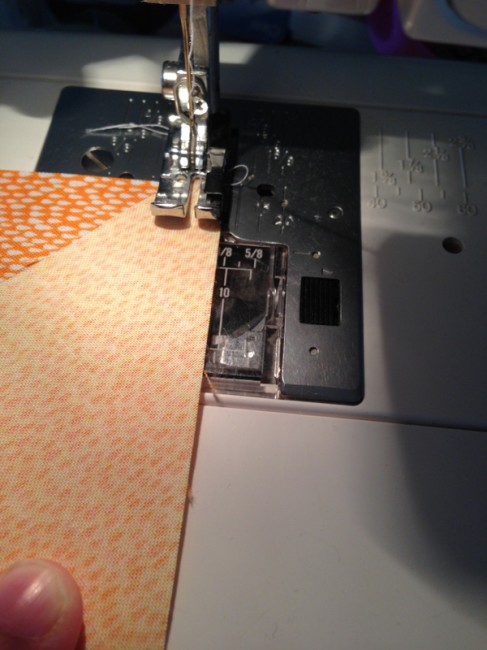
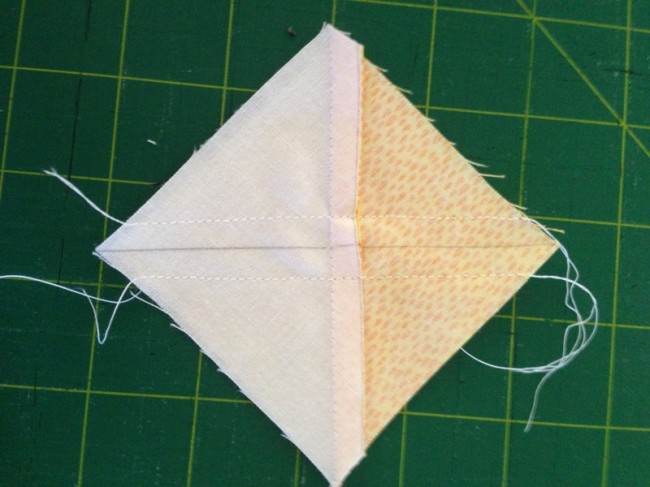
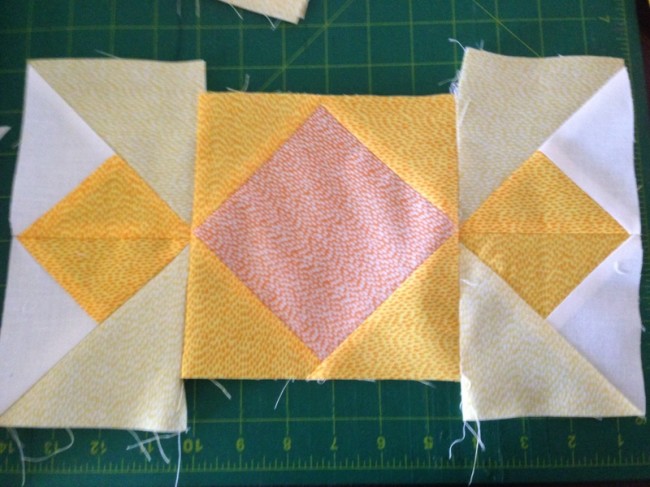
1. Sew your triangles onto the sides of the centre square as shown below.
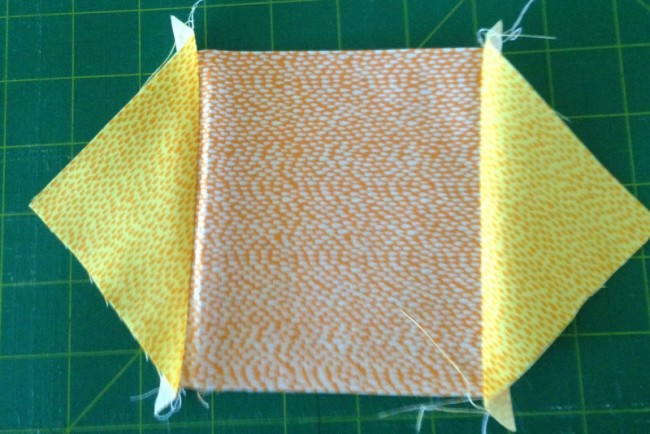
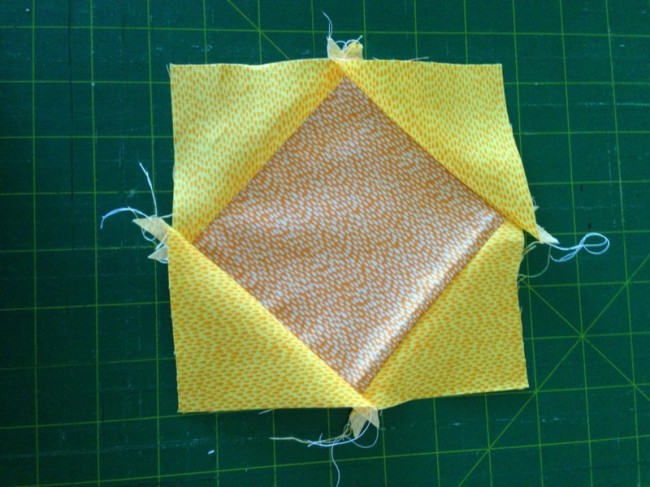
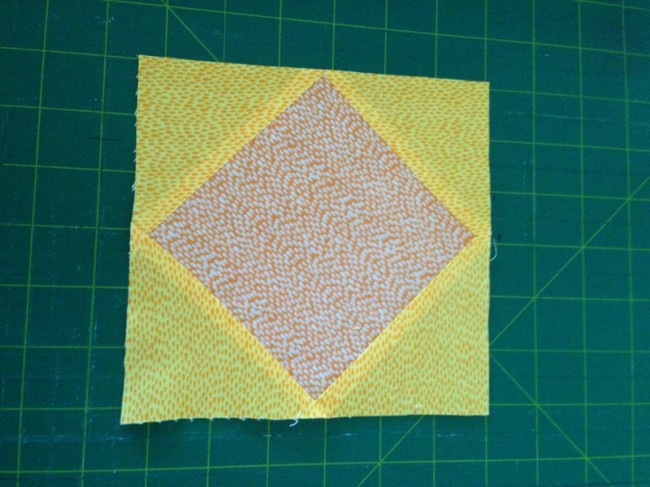
2. Press and trim centre square to 6 1/2 inch square.
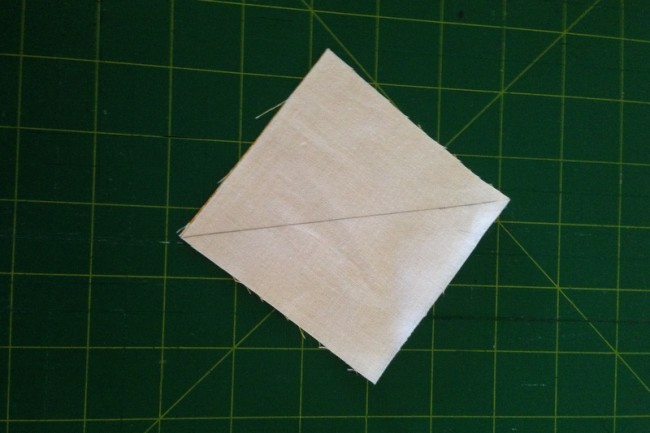
3. Create half square triangles with the white and dark yellow fabric. Press and trim to suit light yellow fabric size.
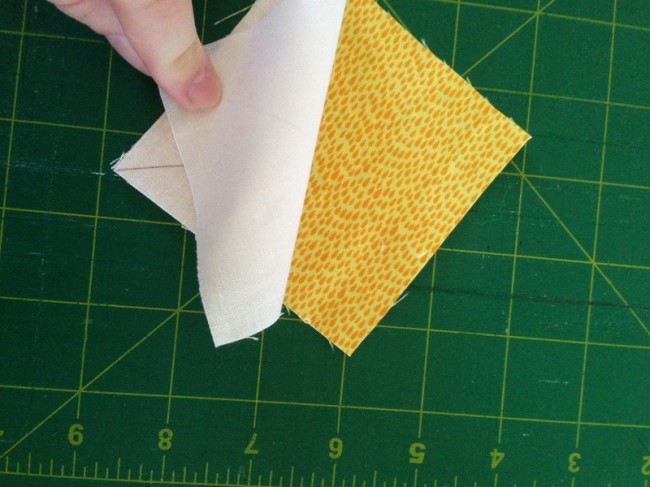
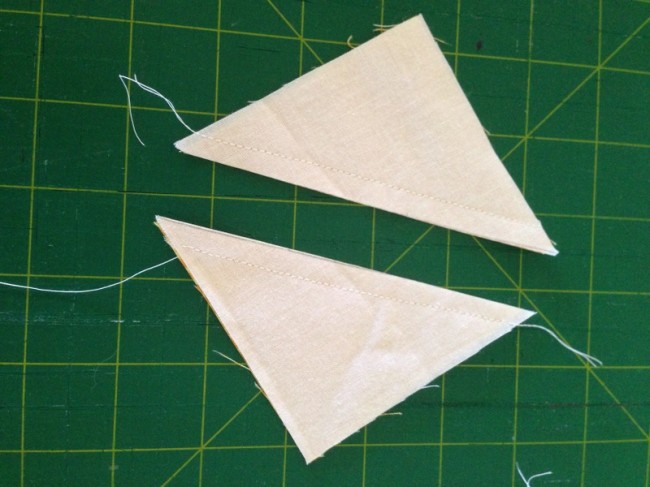
4. Create half square triangles with the above hst’s and the light yellow fabric as shown below.
5. Press all HSTs and great pairs as shown below.
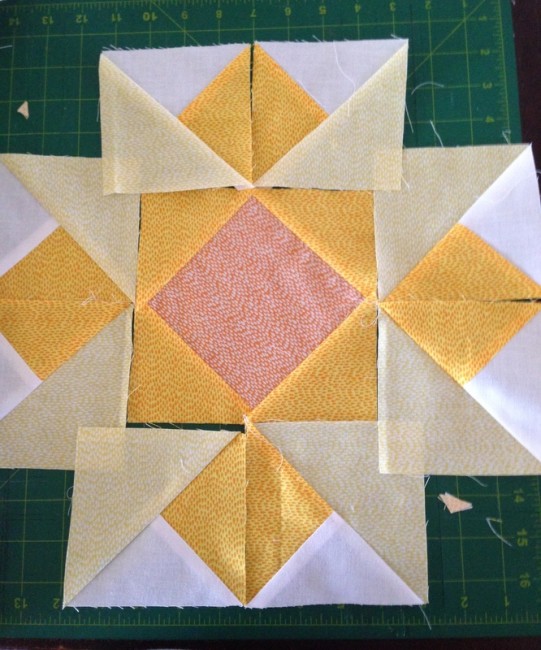
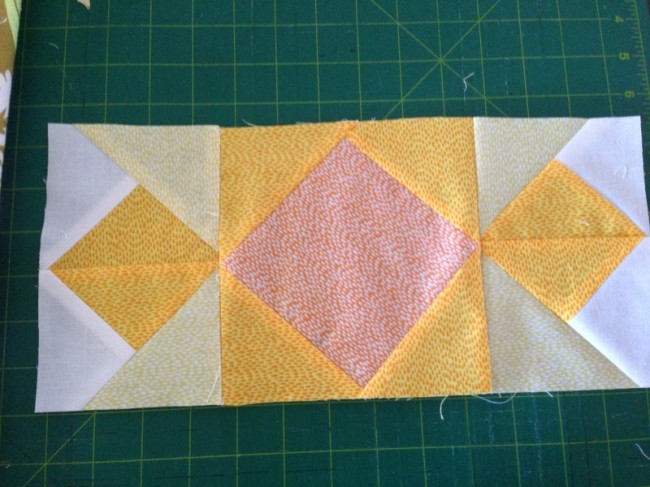
6. Matching the points sew two sets to the side of the centre square as shown.
7. Press and trim to size.
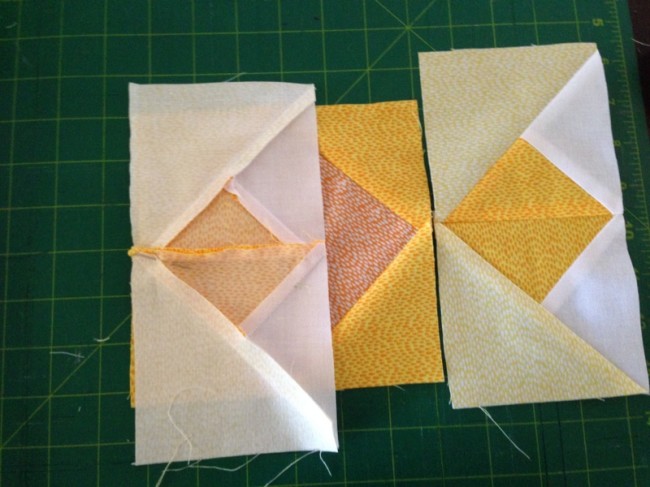
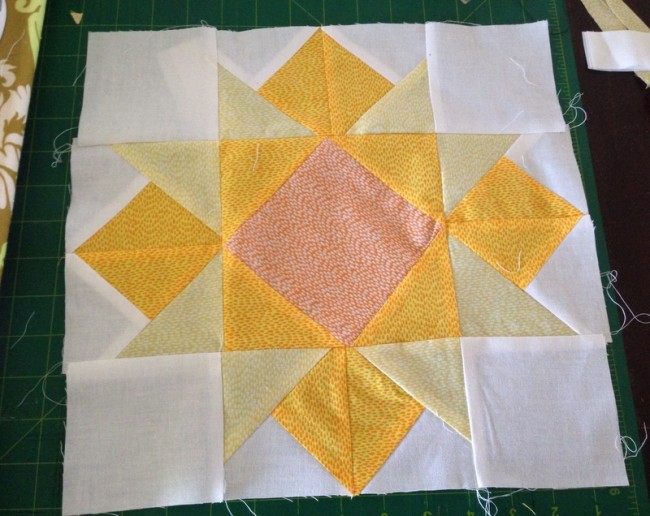
8. Trim top and bottom star points to size and sew white rectangles to either side.
9. Sew to top and bottom of the section you just pressed.
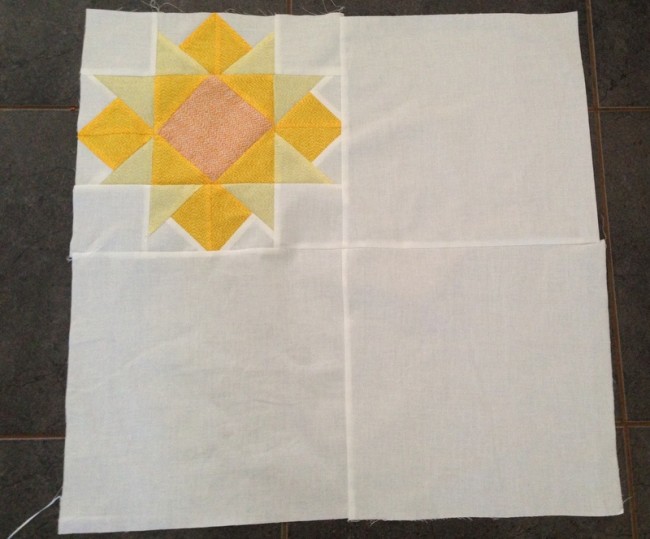
10. Sew to larger white squares as shown below and press.
Tomorrow morning I will be sharing the embroidery and finishing of this mini quilt. So check back then for the fully finished quilt. And HUGE apologies for the confusing tutorial above. I tried to make my instructions as clear as possible but it seems that is a little above my skill level.
It seems I can form a clear plan in my head, but when I try to put that on paper it just all falls apart. Maybe that should be my goal for 2014/2015? Being able to clearly and concisely get patterns and plans out of my head and on to paper?
When Amy is not blogging here on And Sew We Craft you can find her over at Actually Amy where she blogs about her life and other things.


 Crochet Along: Let's Start!
 Crochet Along: How to Change Colours
 DIY: Sewing Machine Extension Table

[…] Now it’s time for part 2 of the Your Are My Sunshine Mini Quilt. […]