I will start by saying sorry for the slightly dark photos it’s a miserable rainy day but I wanted to take the opportunity while I had it to finish up the pillow. This cross stitch has been sitting there waiting for the green and orange border to be finished since last year about this time. I am terrible about finishing the last steps. Hope you enjoy this tutorial and I would love to see the pillow finishes you do with your cross stitch.
Also there is a part 2 and maybe even 3 coming along as I show the different ways to embellish the pillow finish. Enjoy.
Materials
This photo includes supplies you will need for part two as well.
To do a basic pillow finish you WILL need:
- A finished cross stitch piece
- Fabric to back
- Scissors
- Needle and thread and sewing machine
- Iron on Pellon (is optional but highly recommended.)
- Stuffing of some kind to fill your pillow with. (You won’t need a lot for a small pillow)
For the twisted thread edge you will need the yarn and glue as well.
Instructions:
Step 1.
Cut down the fabric around the cross stitch leaving at least an inch leeway. Cut the backing fabric to roughly the same size and one piece of pellon slightly smaller than the backing fabric.
Iron the pellon onto the BACK of the backing fabric. You don’t need to use the pellon but I would highly recommend using it on the fabric as it helps it keep it’s definition when you are stuffing it. You can also put pellon on the back of the cross stitch but I find this difficult to sew as you don’t have the lovely neat fabric lines to sew along.
Step 2.
Place the right sides of the fabric and cross stitch together and sew around 3 sides. Using the Aida fabric you can make sure that the lines are the same distance from your finished cross stitch. Also make sure that the open side is NOT the top of your cross stitch. The reason for this will be explained later.
The photo above shows that I left the side of my piece open as it means less sewing to close it.
Trim down the cross stitch carefully and I also cut off a bit at the corners. Make sure that you don’t cut the threads.
I don’t think I’ve ever shown so many photos of the back of my cross stitch before!
Step 3.
Turn the cross stitch right way out and here is where I trim the open end down. When you trim it make sure you don’t cut off too much. You need to be able to fold the opening down the inside. To make this easier to sew later I also iron it down while it is flat and that makes it easier to sew together once stuffed.
You can see the stuffed pillow below with the edge folded down. You want to stuff it so it is able to close easily but still be full.
Step 4.
Sew the opening closed. I always use a ladder stitch which hides the opening and doesn’t show. It is particularly important to do this if you aren’t using any trims. On the other hand if you are adding the twisted thread trim you could get away with a neat little whip stitch. Your choice.
FINISHED
And here is your finished pillow. You are welcome to add embellishments and trims to turn it into your own and I am going away now to write the tutorial for twisted thread ready for you next week.
I would love to see the cross stitch pillows you make from this tutorial.
Happy Stitching,
Caitlin
p.s. I’ve had a question about the pattern and where to find it. It’s one of my own designs that is available from my etsy store. My store can be found here.
I stitched it on a grey aida, I think it’s 16ct, it was from a grab bag so it wasn’t labelled. I buy my cross stitch fabrics from www.sewitall.com.au they have some great grab bags that are awesome for stitching ornaments on and you get lots of pretty and different fabrics.
My mother taught me to crochet when I was 9 and I was hooked. Since then I do any craft that tickles my fancy which at the moment includes cross stitch, knitting, crochet, quilting and sewing toys and clothes. I like to always have something to do.


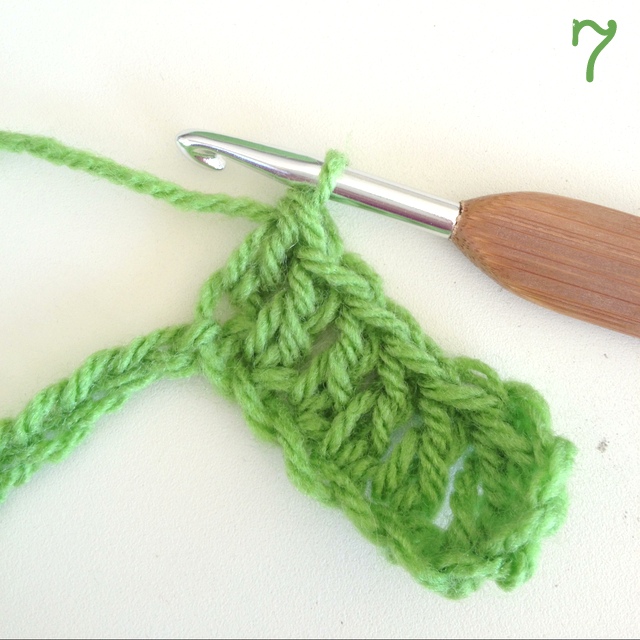 Crochet Along: Let's Start!
 Crochet Along: How to Change Colours
 DIY: Sewing Machine Extension Table
[…] is a quick run through this week I just want to show you another way to do a pillow finish for your cross stitch. When you have a really small design sometimes it’s better to quilt around or beside it to […]