
So how did you go with the first post on free motion quilting? Did it make sense to you? I really hope you’ll give it a try, because it’s an incredibly satisfying thing to do!
If you do try it, and it’s not quite working for you, let me know in the comments and I will do some more videos to show you where you might be going wrong. ![]()
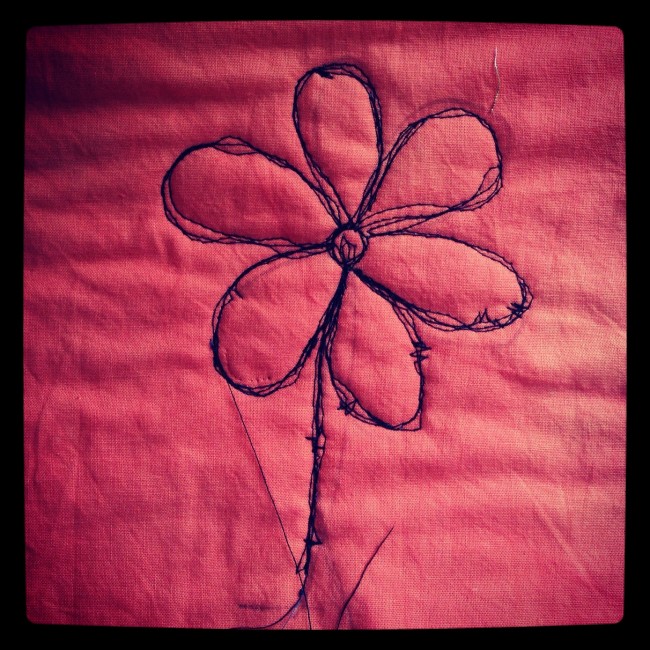
The second video shows you how to draw something using free motion quilting.
Video Notes:
- In the video I mention about writing names using free motion quilting. Kate Mason has some great examples of this on her blog!
- Use a washable fabric marker like these to draw on your design.
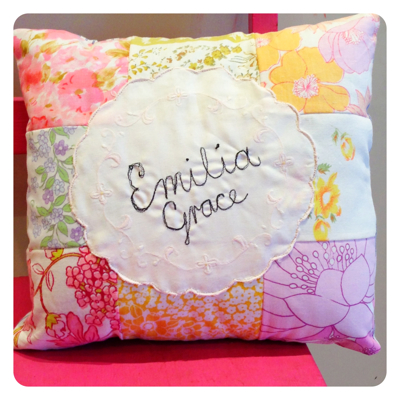 Image from here. Copyright Kate Mason.
Activity For You:
This week’s activity for you to try at home is to draw a simple picture (a flower, a heart, a star - anything simple without too much detail), and start to quilt it. Remember to use your two layers of fabric sandwiching some wadding/batting, and HAVE FUN!
20-something crafter. I love having a go at almost anything!


If you enjoyed this article, please consider sharing it!


One Response to Free Motion Quilting Part Two
Leave a Reply
Find us here also:


Follow us via Networked Blogs

Want to learn some new skills?


 How to Sew a Simple Pencil Case
 Bookmarks for Mother's Day
 DIY: Sewing Machine Extension Table
 Christmas Trees on Pinterest
 Big Blue Tote
 {Guest Post} Crochet Bike Seat Cover Tutorial
 Tutorial: Baby Doll Sling
 Stars on Pinterest
 How to Spray Baste a Quilt
 Tutorial: Easy Girl's Skirt


Thanks again. I like the idea of no ends to run in. I did a butterfly, but then spent an age running all the ends in. I also wondered if you use special embroidery thread. I have just bought a reel, but it does not seem hugely different to ordinary sewing thread.
Ginny recently posted..Seaside Boy on A Scallop Shell